Control Data Access Using “Least Privilege” Principals and Privileged Identity Management in Microsoft 365
Administrative and privileged roles are a highly attractive target for attackers in cloud environments and are a frequent goal for those looking to compromise an organization. The power inherent in administrative/privileged roles is often immense: once a threat actor has access to a privileged role, they gain far more ability to attack and degrade the capabilities within a cloud service. Otherwise known as privilege escalation, taking over admin accounts is a tactic used by many Advanced Persistent Threat (APT) groups, as well as more common cyber criminals and other unsavory opportunists. It is vital to understand and monitor who has access to privileged roles in an organization. Since these roles are choice attack targets, they should be monitored and managed more carefully than regular user accounts.
Azure AD Privileged Identity Management (PIM) is a tool used to monitor and control access to elevated privilege roles and resource access in Microsoft 365. In simpler terms, it’s a way to make sure that the bare minimum of privileged access is granted to the right people, at the right time, for as long as that access is appropriate. PIM is designed to reduce the attack surface for privileged accounts by enabling Just-In-Time access as well as incorporating the Principle of Least Privilege.
There is a learning curve associated with setting up and using all the features in PIM, and you must have the correct Microsoft license: an Azure AD Premium P2 License or an Enterprise Mobility + Security (EMS) E5 license. The benefits for most organizations outweigh the cost of getting started, particularly when weighing the costs of breaches. Thankfully, there are a few features that can be picked up and used right away.
PIM Use Cases
One simple and immediate use case for PIM is the ability to see what accounts are assigned elevated permissions. Generally, only a few users within an organization should have this role assigned. It’s quick and easy to remediate over provisioning of the Global Administrator role within PIM.
In the screenshot below, we can see that there are 3 “active” users who have been assigned the Global Administrator role. Clicking on the “Global Administrator” row allows us to see which users are assigned that role, the scope of the role assigned, and the expiration date for the role assignment (if any). This means we can quickly verify that users assigned this role have the appropriate access and remove any accounts that no longer need this role.
Another feature in PIM is a very granular permissions schema. As seen below, there are many types of built-in roles available. These built-in roles are fixed collections of permissions that are designed around particular use cases.

Another feature in PIM is a very granular permissions schema. As seen below, there are many types of built-in roles available. These built-in roles are fixed collections of permissions that are designed around particular use cases.
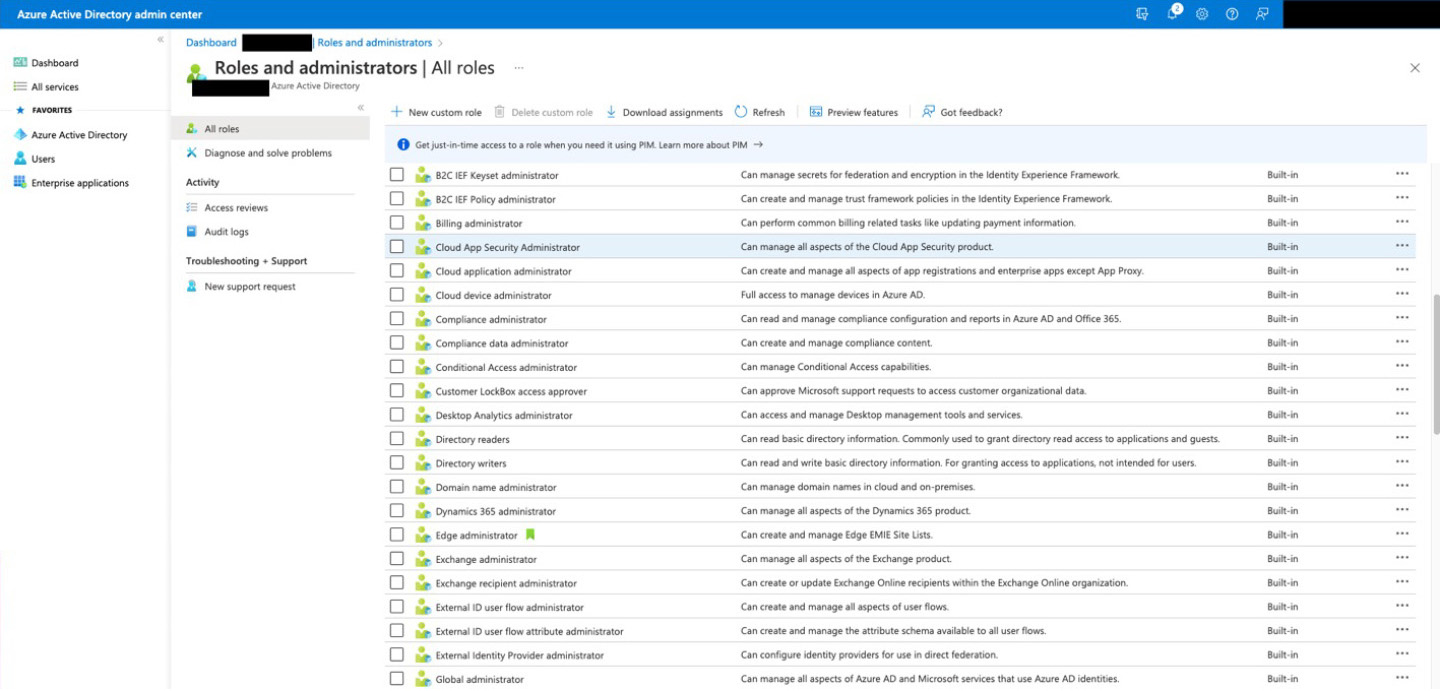
While potentially intimidating at first, the wide variety of roles is meant to provide a flexible way to implement the principle of least privilege when it comes to assigning permissions. We can see what permissions are assigned to a particular role by clicking on the “Description” tab within the individual role, as shown below.
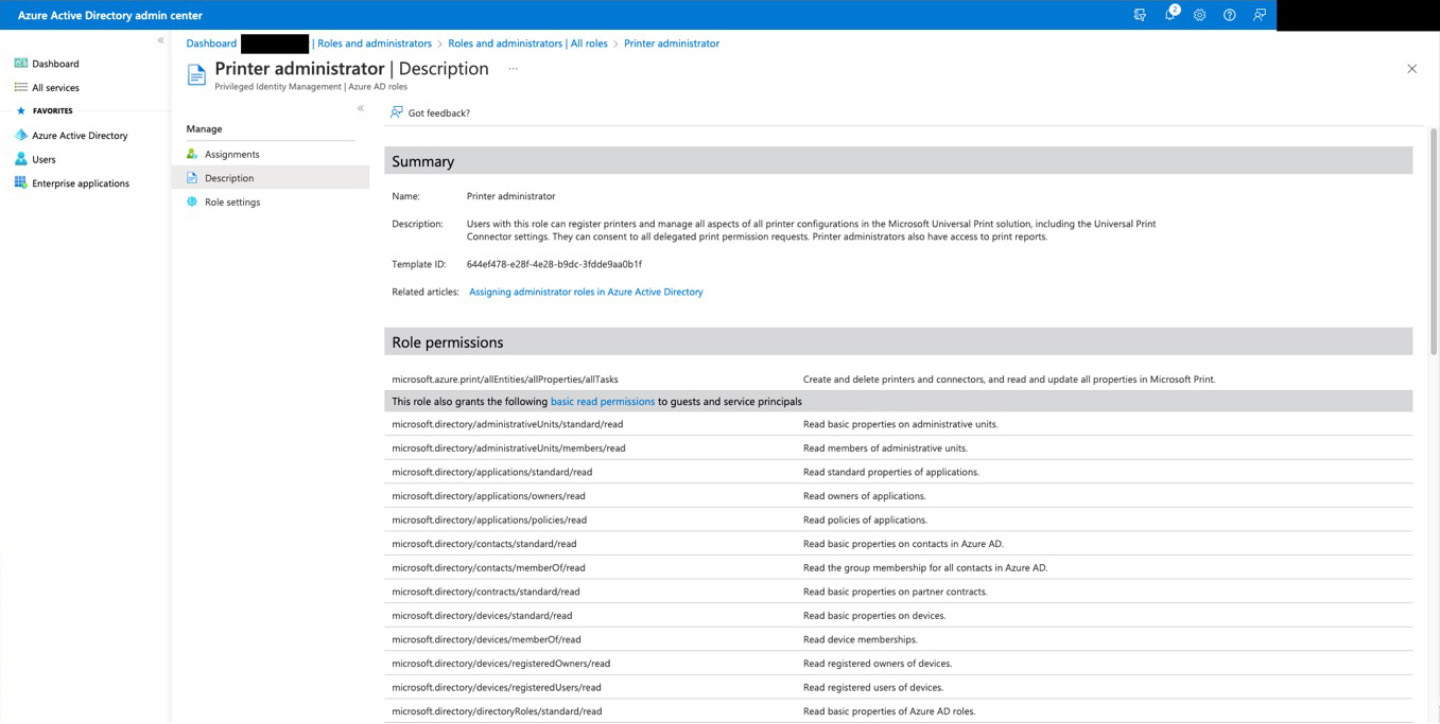
Using built-in roles is a good place to get started to regulate the permissions environment more tightly. Implementing built-in roles will likely take some trial and error within an organization, so it’s best to start with a small set of users as a test group to determine what roles work best.
More Advanced PIM: Just in Time Access
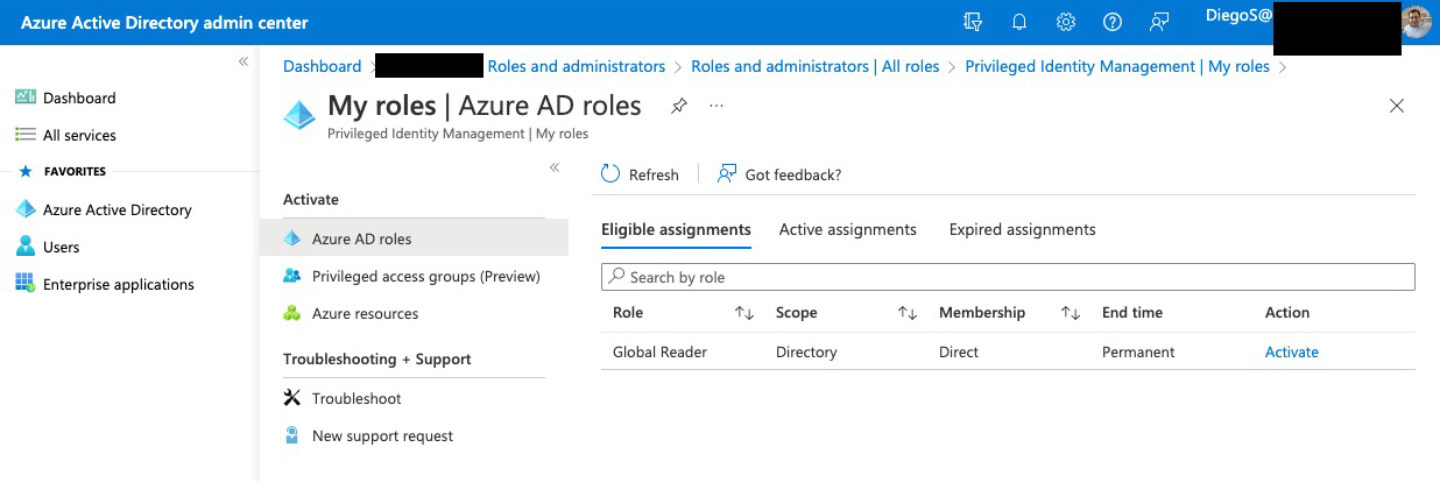
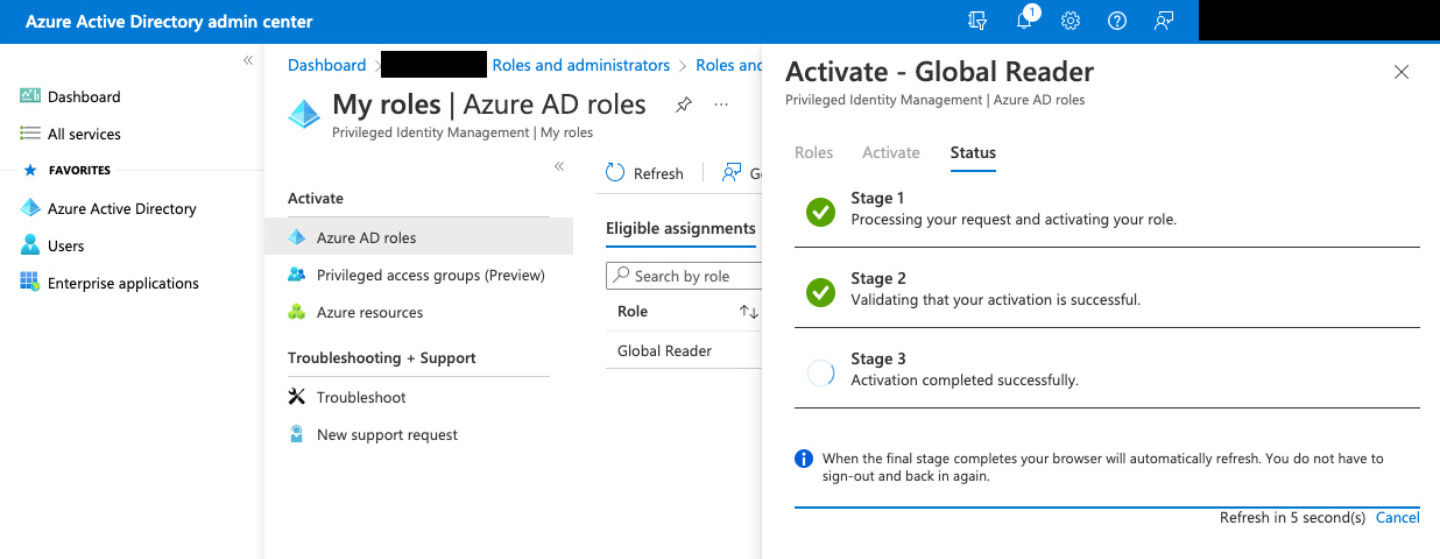
For those who can commit to a more involved permissions management schema, implementing Just in Time (JIT) access is a great way to further reduce the attack surface associated with privileged roles. Under PIM, privileged roles can be assigned temporarily or permanently. These roles can be assigned on a fixed temporary basis (say for a few days) or can be provided on an “as-needed” basis by making the privileged assignment available for use at the end users’ discretion. The end user can “activate” the privileged role by accessing a link within Active Directory with no further action needed from the administrator. In the screenshot below, Diego Siciliani has been made permanently eligible for a Global Reader admin role. In this scenario, the role has been permanently assigned as eligible, though temporary assignments are also possible.

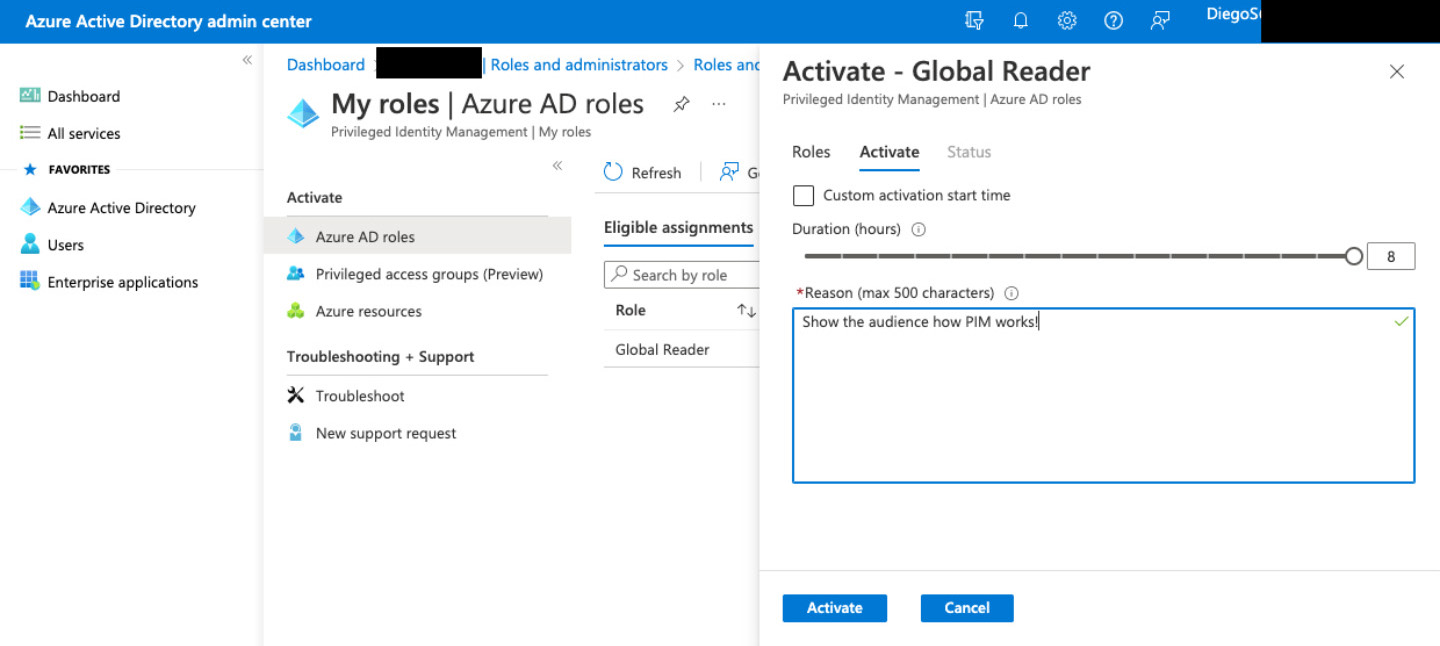
To activate the role, Diego needs to sign into Azure Active Directory and click the “activate” link next to the role he has been made eligible for. This will grant him access to the Global Reader role for eight hours (the default time frame). It will also require him to set up MFA if not already enabled.
MFA Setup: Step 1
MFA Setup: Step 2
MFA Setup: Step 3
MFA Setup: Step 4

Diego now has access to Global Reader permissions. If he needs access beyond the eight-hour default setting, he can activate the permissions again as needed. These permissions can be revoked at any time by an Azure AD admin, or they will revert back after the time period has expired. For more information on setting up a PIM deployment, visit the Microsoft documentation.
Related Resources
-

Enterprise ServiceNow Knowledge Bases at Risk: Extensive Data Exposures Uncovered
Read the blog to learn about ServiceNow’s Knowledge Base data exposure risks and how to mitigate these issues.
-

Potential Widespread Data Exposure Analysis: Oracle NetSuite
Read the blog for an analysis on the potential data exposure of Oracle NetSuite with a thorough understanding of NetSuite access control model, basic SuiteCommerce concepts and more.
-

Step-by-Step Guidance to Secure SaaS Environments including Snowflake and ServiceNow
Learn the chain of events behind the Snowflake breach and get guidance to secure your SaaS environments including Snowflake & ServiceNow.